The technical materials associated with a lighting design will vary depending on the kind of lighting job, but the goal of lighting paperwork generally remains the same: To provide clear and concise information about the designs functionality to the electricians and the production team.
Below is an example of the lighting paperwork for an opera I was lighting designer for in undergrad. The basic paperwork for theatre lighting consists of:
- A Light Plot in plan view
- A section view
- A channel hookup
- A magic sheet
NOTE: This is a introductory guide. We will not be exploring the nuances of drafting, safe rigging and electrical practices, or fixture types. If you want to learn more please feel free to contact me.
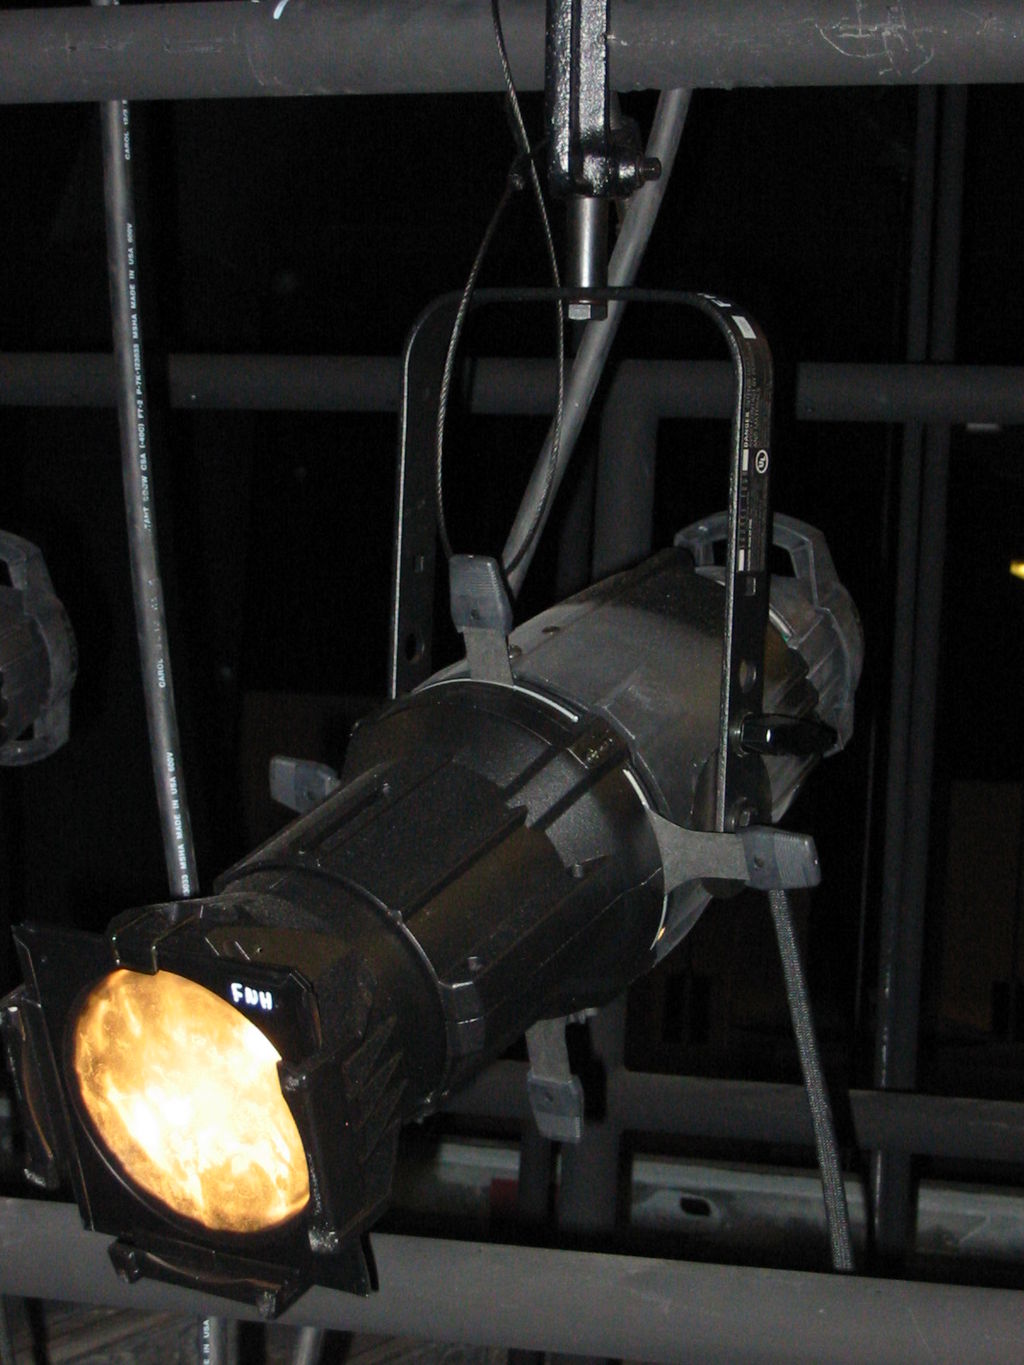
A light plot is a plan view of the theatre showing where your lighting instruments will be placed. Most theatrical lighting instruments come with a pipe clamp attached to them so that they can be clamped anywhere along a steel pipe. Most theatres contain rows of these pipes installed specifically for hanging lights on, and each pipe is generally are referred to as an electric. Lights are then connected to electronic dimmers that are controlled with a lighting console via the DMX512 communication protocol.

The light plot represents lighting instruments as schematic symbols. For instance these three instruments:
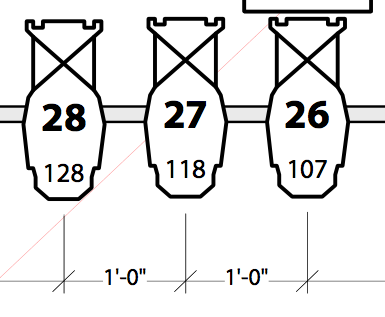
Are three ETC Source Fours with 19 degree lenses:
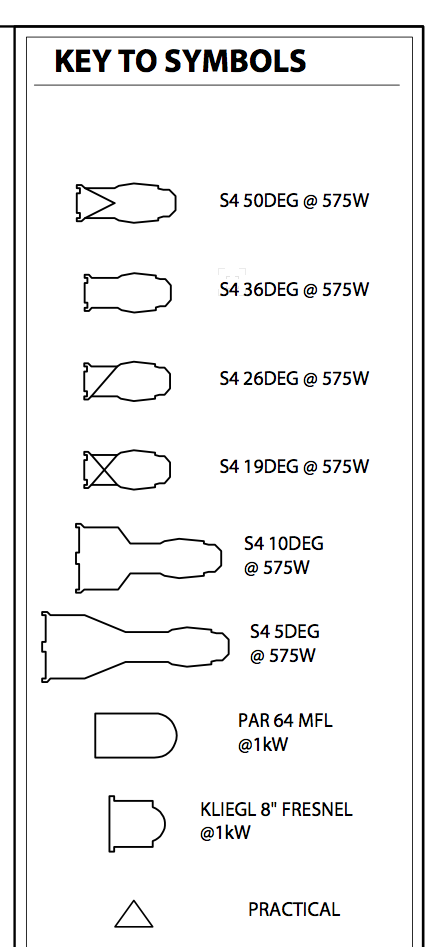
You can tell this by using the Key To Symbols, which is an important part of any light plot. The key to symbols defines every kind of light used in the lighting design:
In addition to a Key to Symbols, a light plot should also have a Label Legend. The label legend explains how the light is circuited, any associated accessories, and if it needs to be hung on the pipe in any special way:
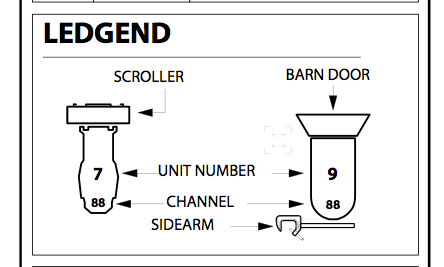
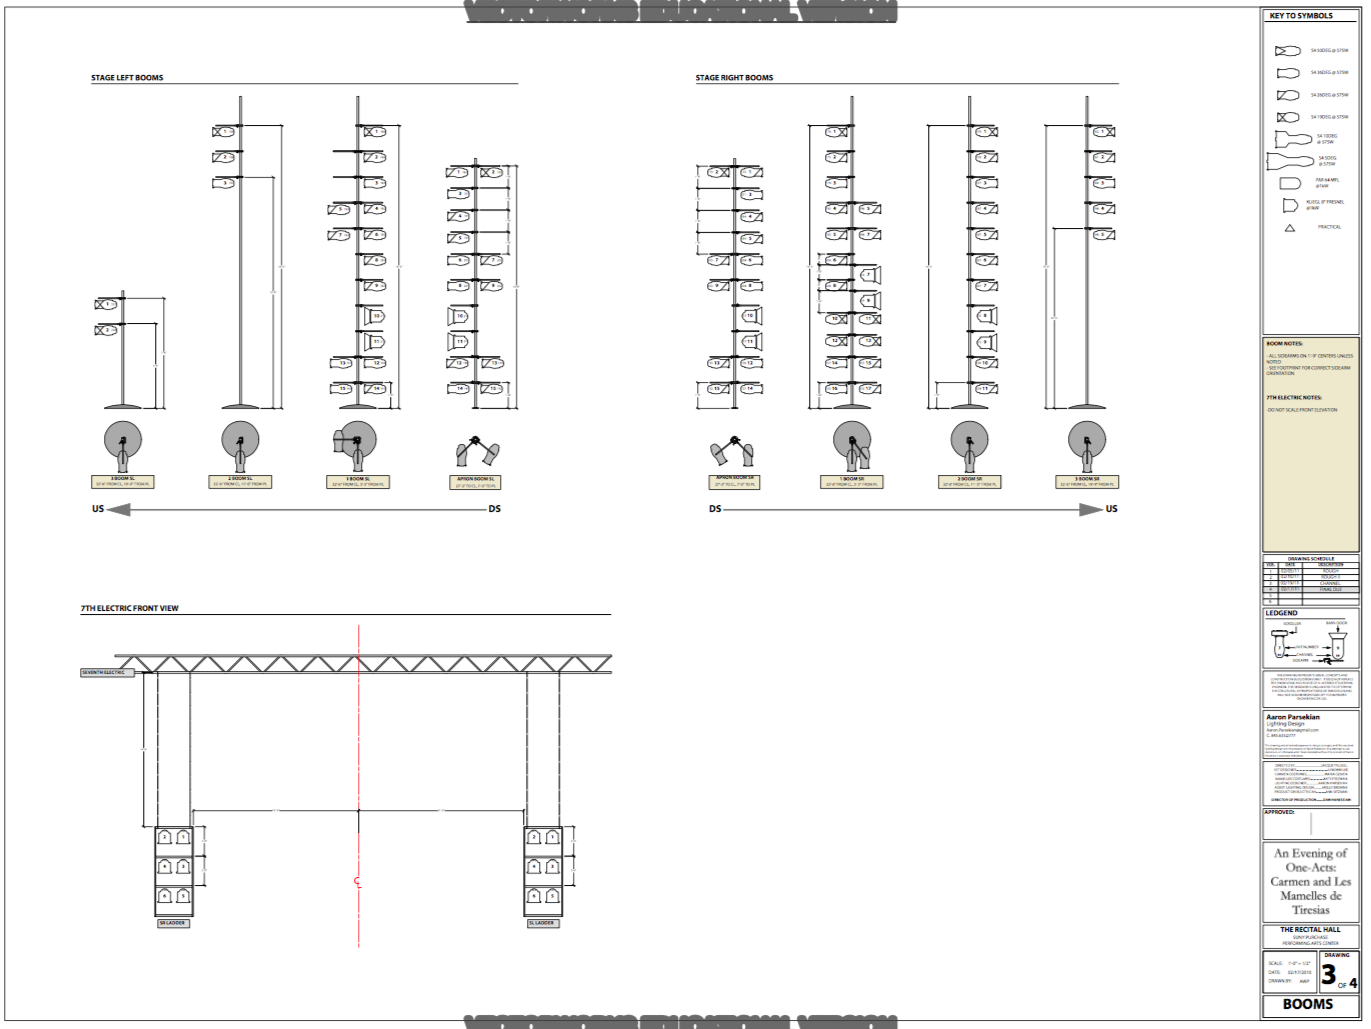
Sometimes lights are placed on vertical pipes called booms that extend up vertically from the floor. They’re probably called booms because of the noise they make if they were to fall over. If you don’t enough space on your light plot to draw them, they are generally represented by their footprint on the light plot and then drawn on a separate page as an elevation:
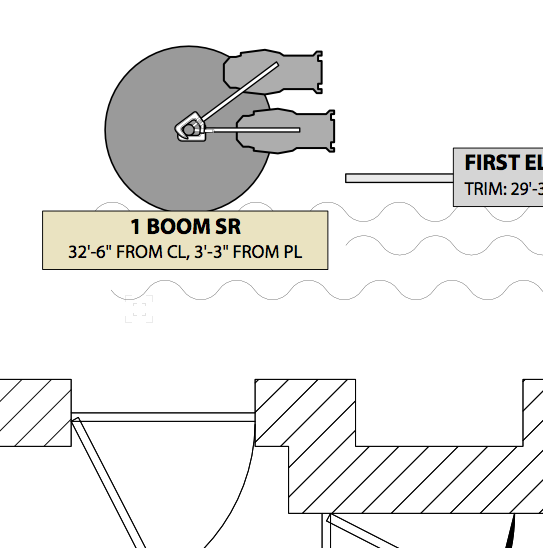
The first boom Stage Right is redrawn on another page as an elevation:
The Section View is a cross-section of the Theatre showing where the lighting instruments will be in elevation. Generally the section is “sliced” through the theatre on the centerline of the stage looking either to the left or to the right:

The Channel Hookup lists all of the lighting instruments, usually numerically by channel. Most lighting control consoles provide a second layer of organization after the DMX address called channels. These channels allow designers to group multiple DMX dimmers into a single channel, and to organize the light plot more coherently with the design goals. For example, you might place eight blue downlights in channels 11,12,13,14 even though they are plugged into DMX dimmers 18, 27, 34, 40. 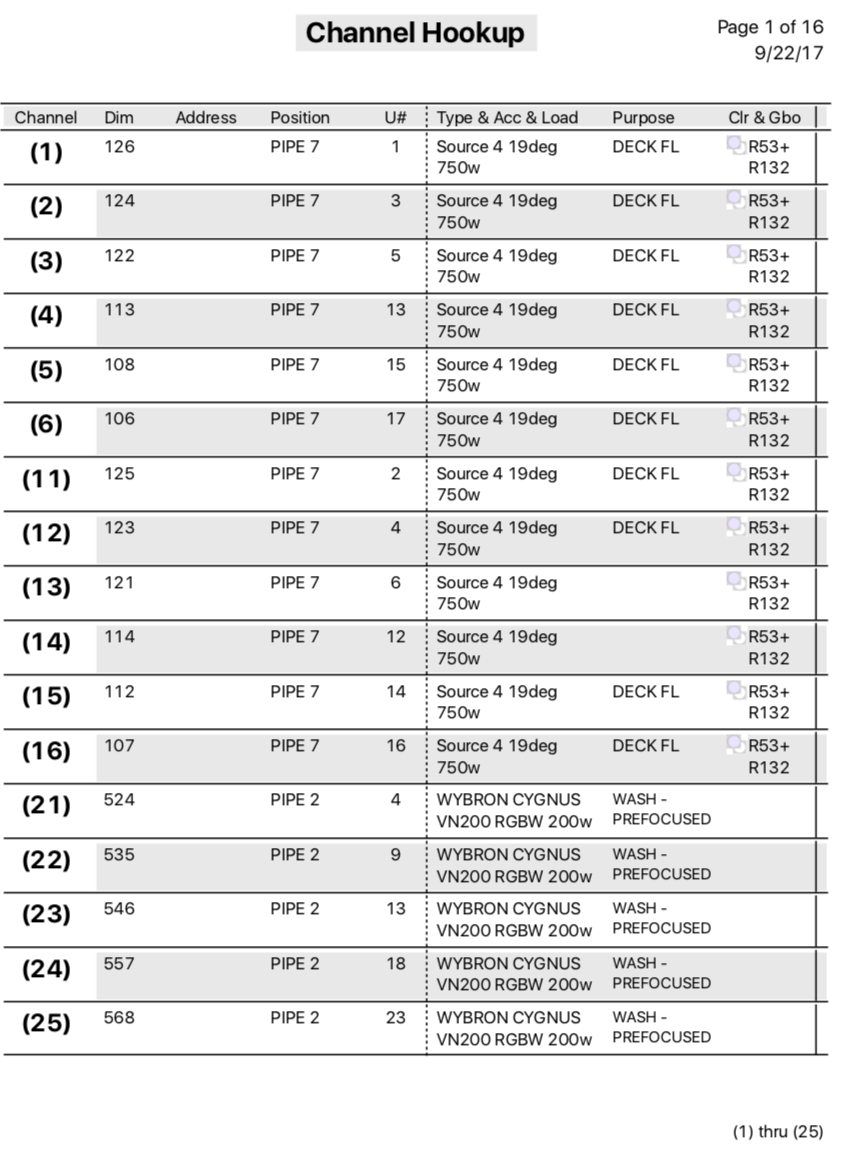
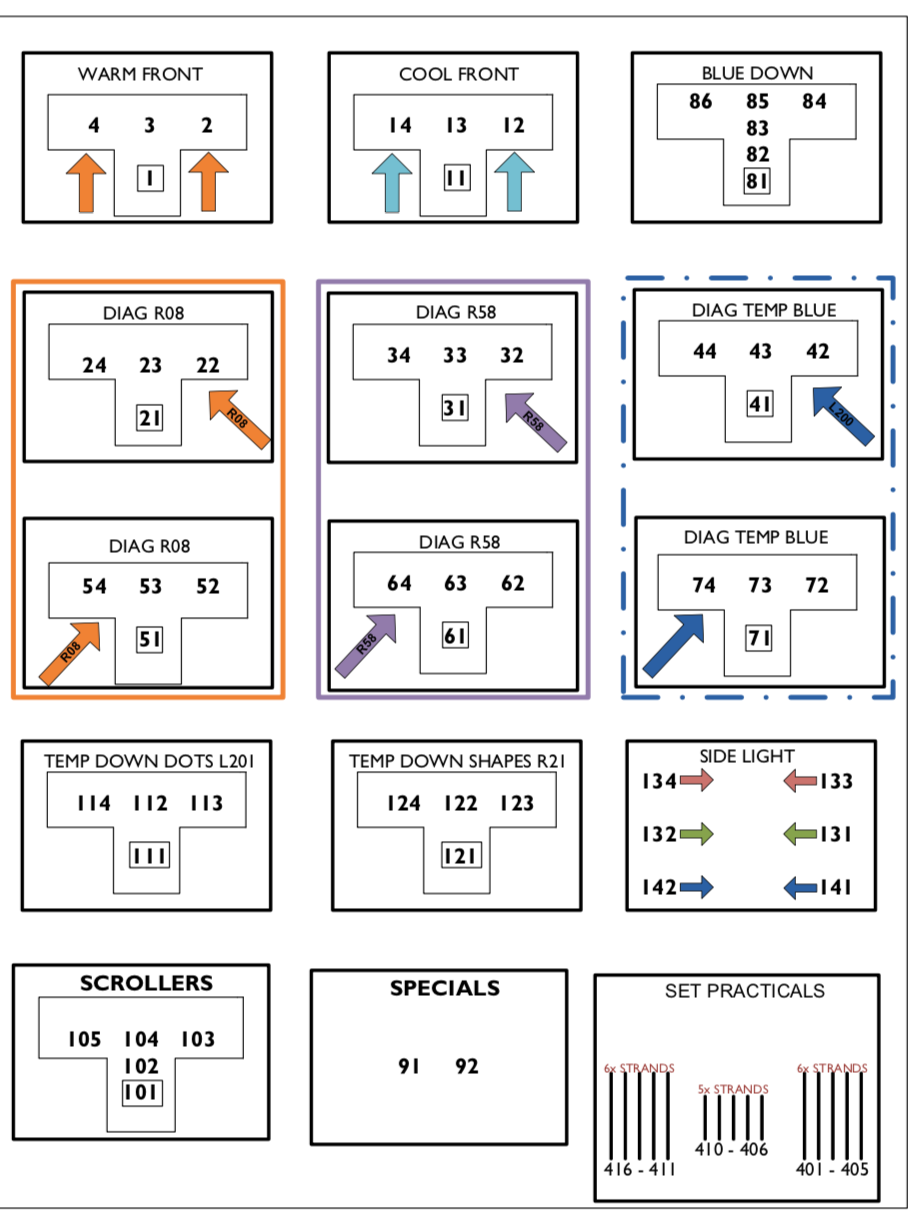
The Magic Sheet groups channels into design based groups. It serves as a shortcut to get lights on quickly. Instead of scanning an entire channel hookup or light plot to turn on all of the blue downlights, or to find a specific light pointed through a scenic window, the magic sheet is often the quickest guide to what lights are hung in the air